PyCharm Professional
The official documentation on configuring a docker interpreter is pretty complete, but there are caveats. Below, you will find an improved configuration guide helping you to set up the runtime quickly.
The guide tested with PyCharm 2023.1.4 Professional.
Note
If you have a different version of PyCharm, we cannot guarantee that the settings will work and match the screenshots.
Project Preparation
Clone the repo:
git clone https://github.com/insight-platform/Savant.git
Copy and rename the template (let’s name the new project
my-module):cp -r Savant/samples/template my-module
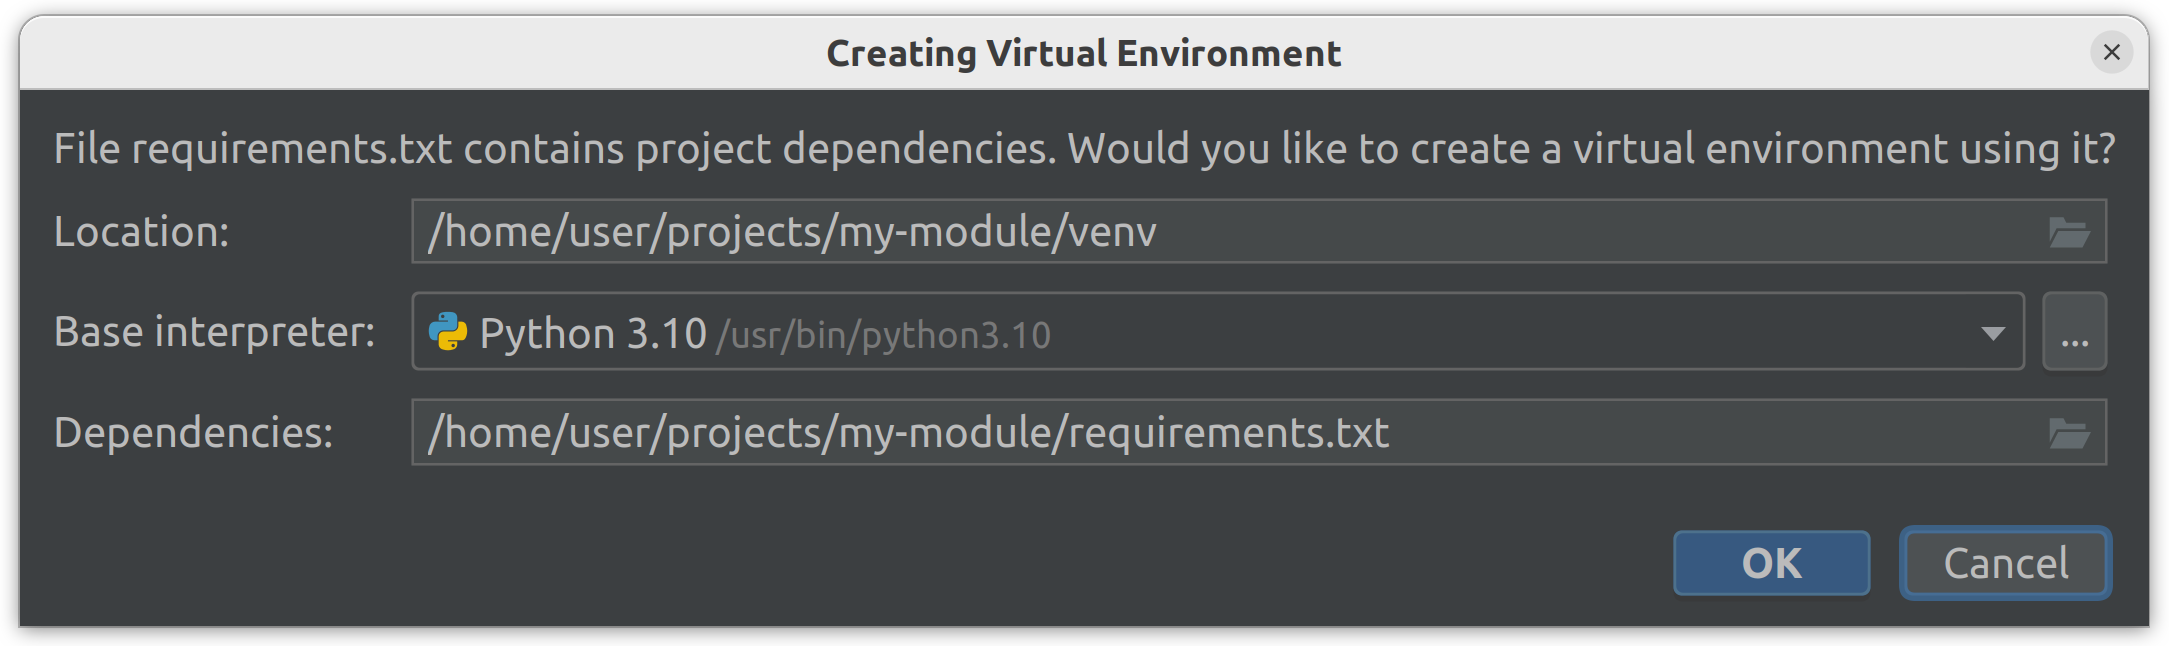
Start the IDE and create a new project in the
my-moduledirectory.When opening the project, skip the step related to the environment creation: click Cancel on Creating Virtual Environment:
Setting Up The Interpreter
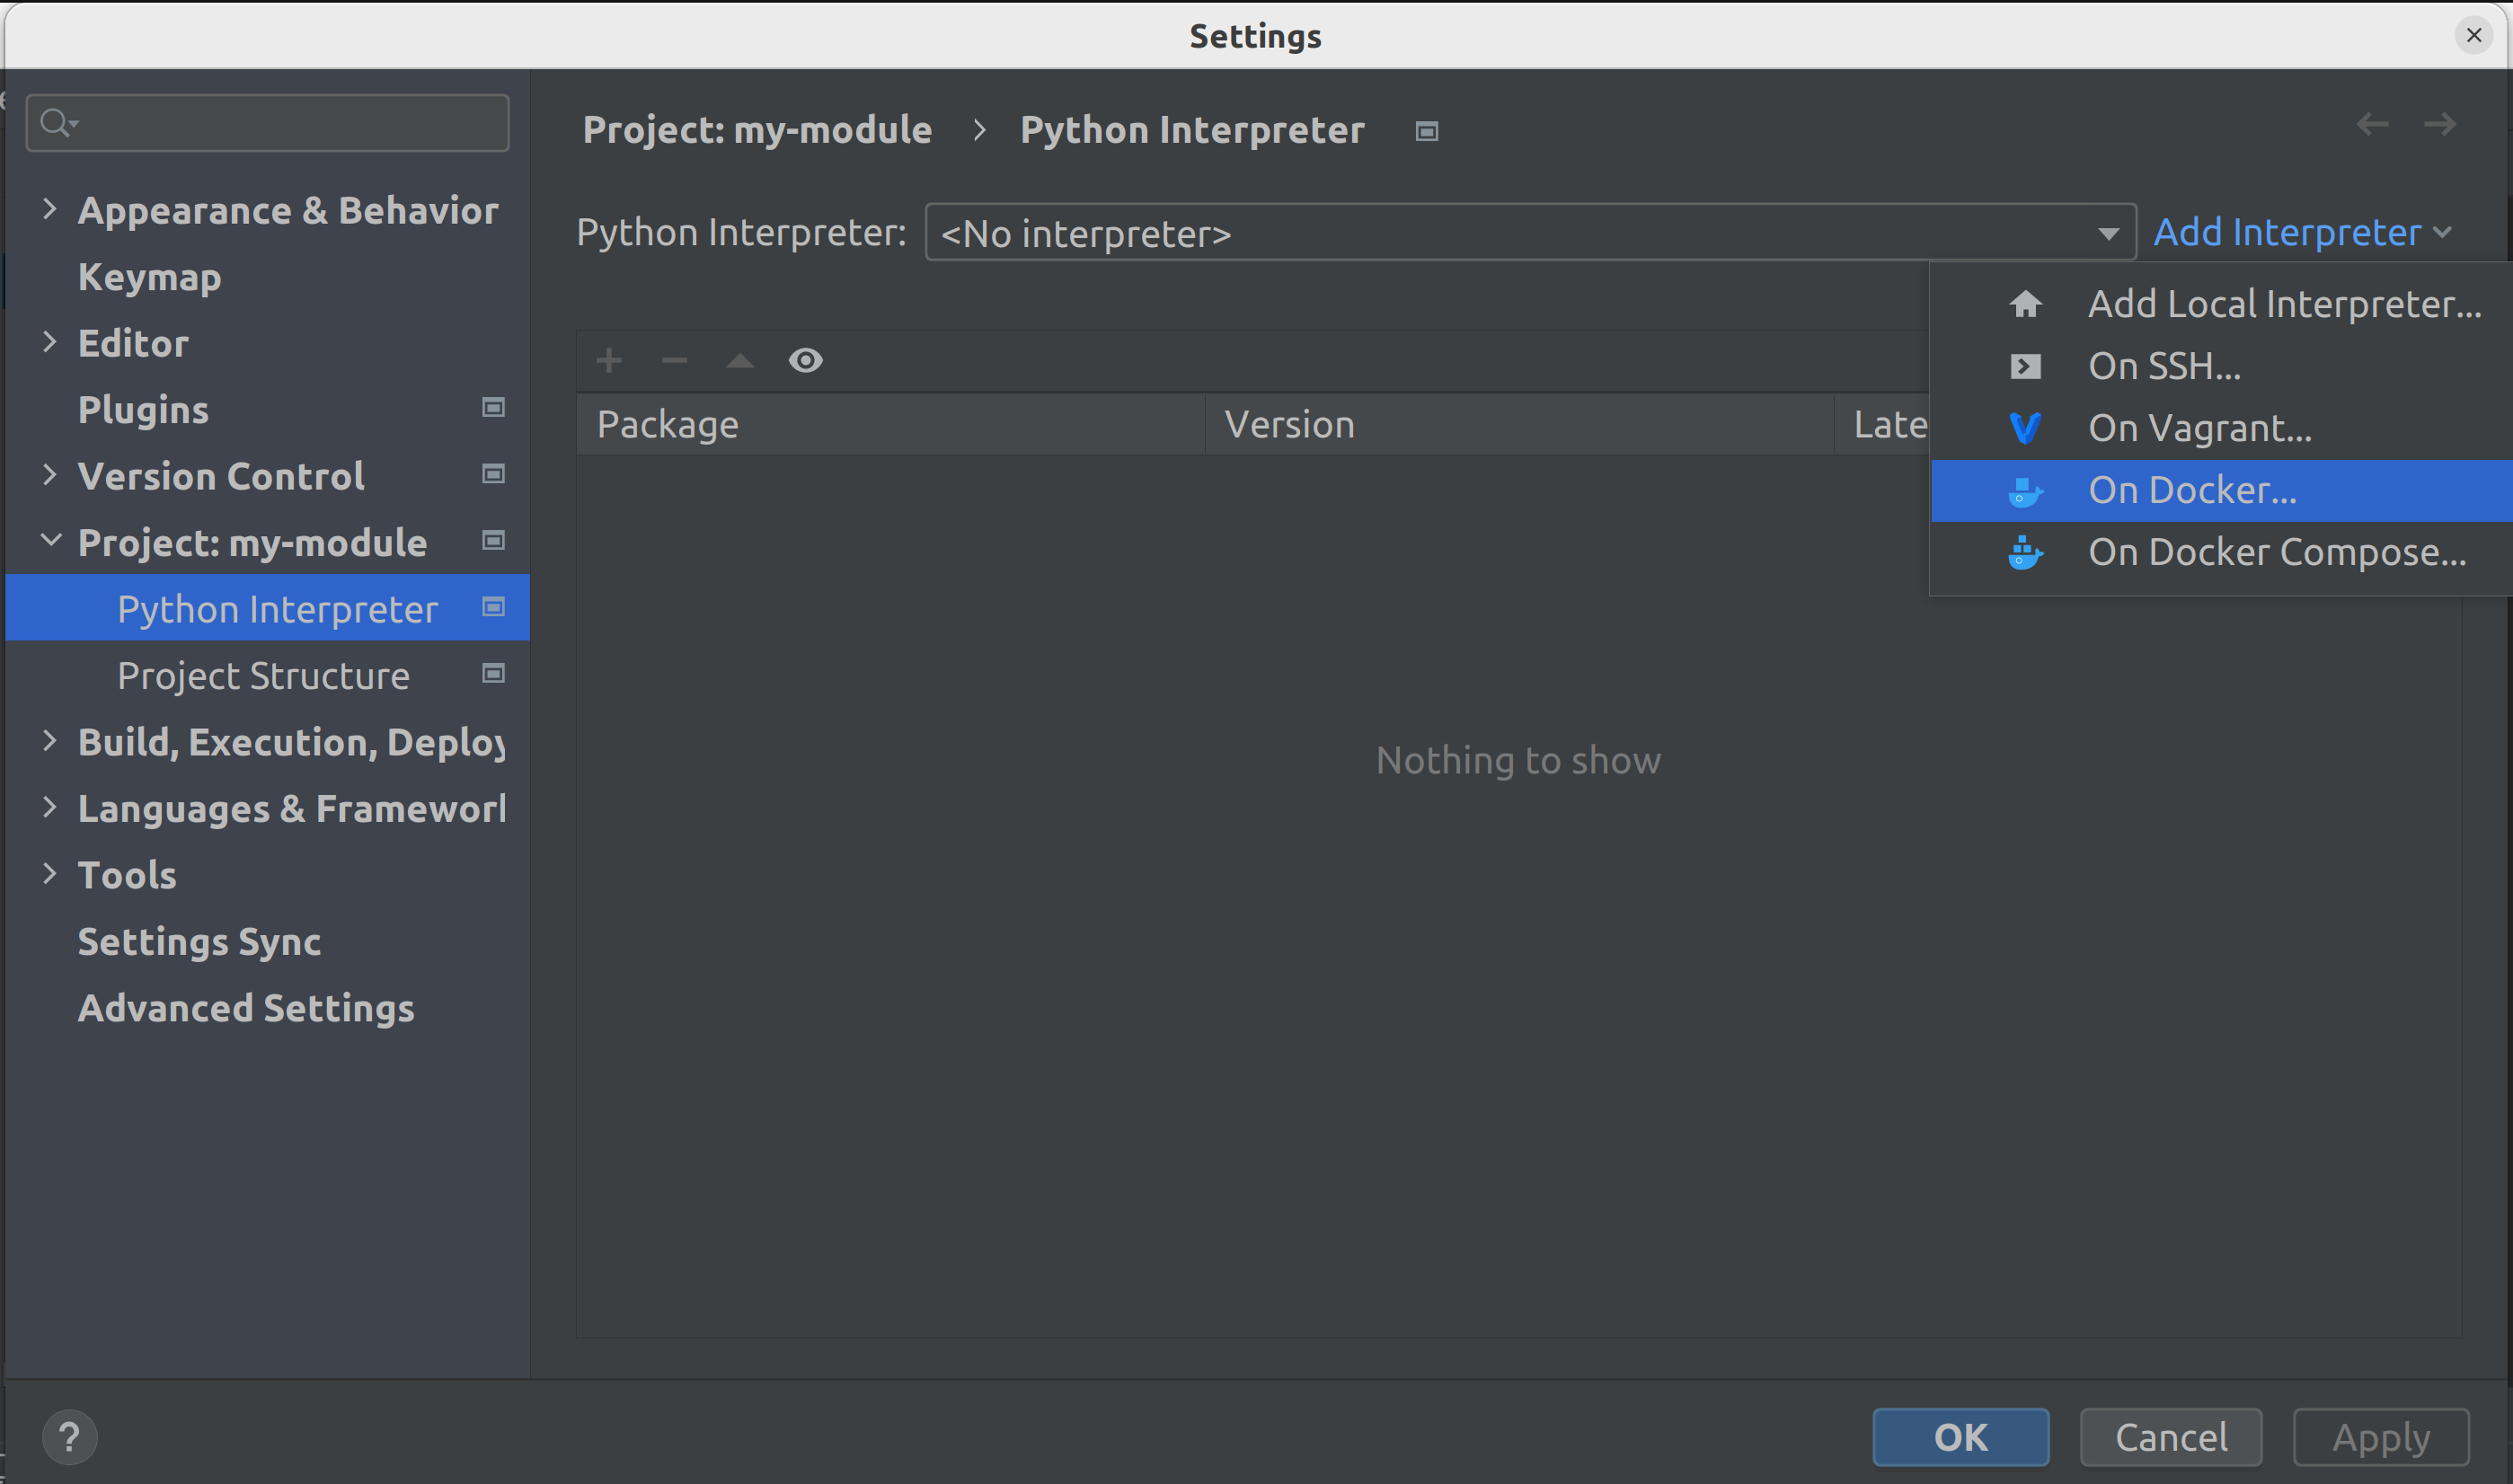
Open the project settings with File > Settings … or Ctrl+Alt+S.
Choose Project: my-module > Python Interpreter section.
Add a new Python Interpreter by clicking the Add Interpreter, and choosing On Docker…:
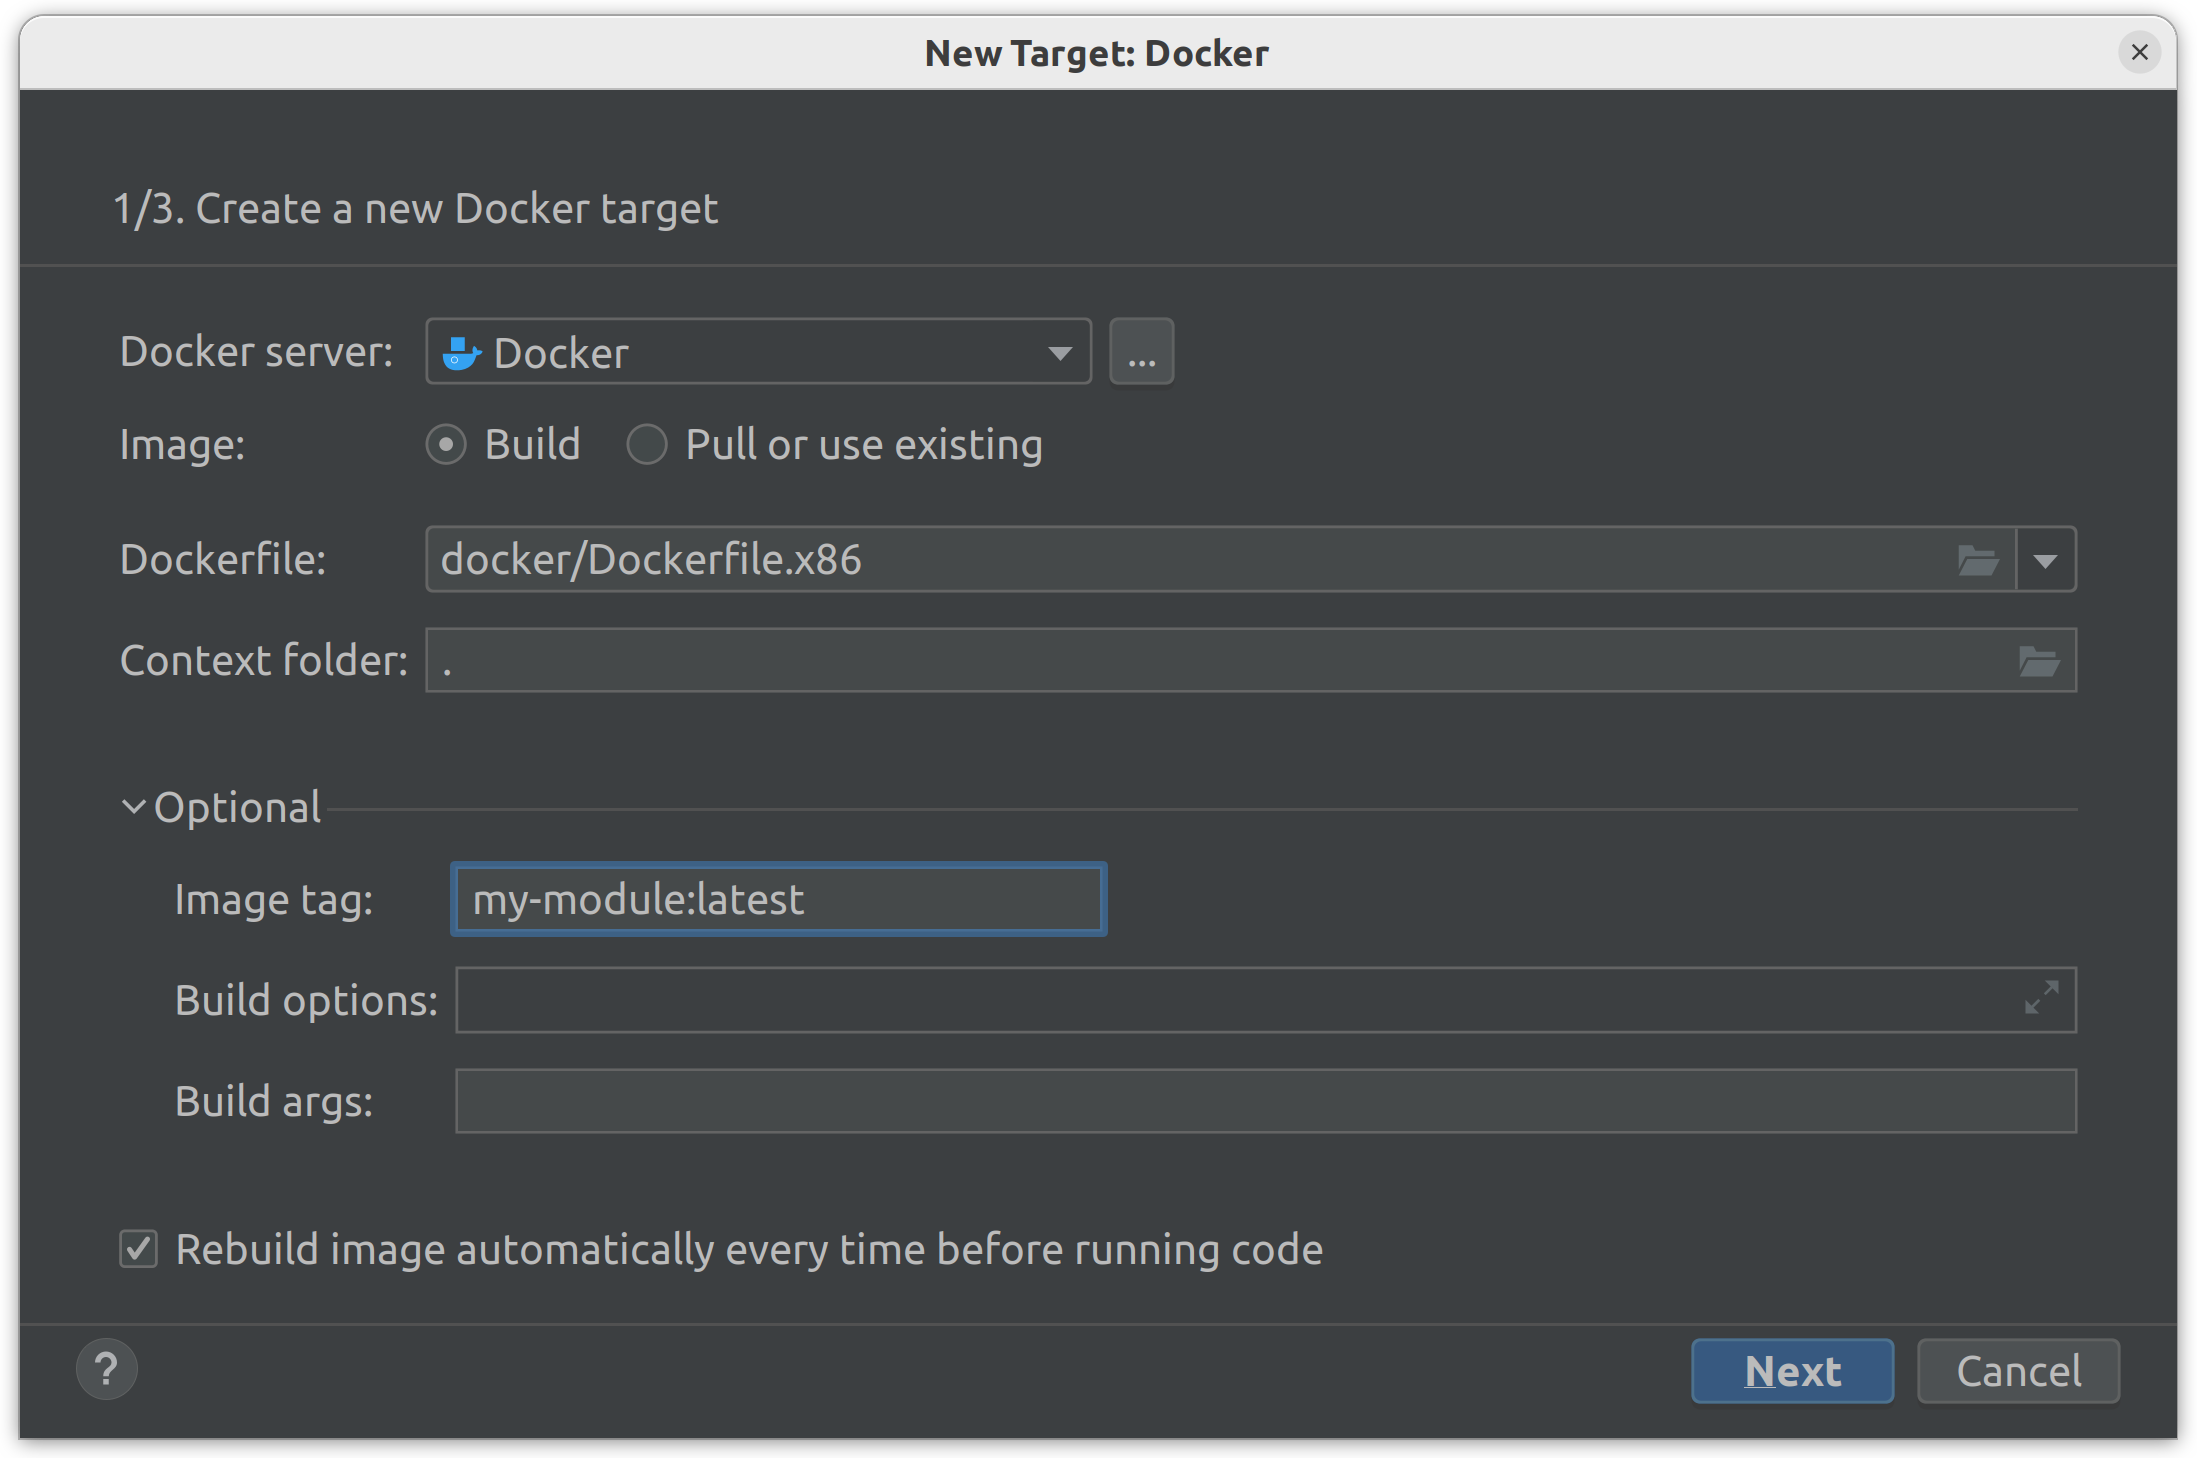
In the modal window:
[Step 1 of 3]: Choose Dockerfile:
docker/Dockerfile.x86ordocker/Dockerfile.l4t, if you are on Jetson, and set up Context folder (should be set to the root of the project). In the Optional section you have to specify an Image tag:Warning
If you do not specify Image tag, docker images and container will not update correctly.
[Step 2 of 3]: Make sure docker build is successful.
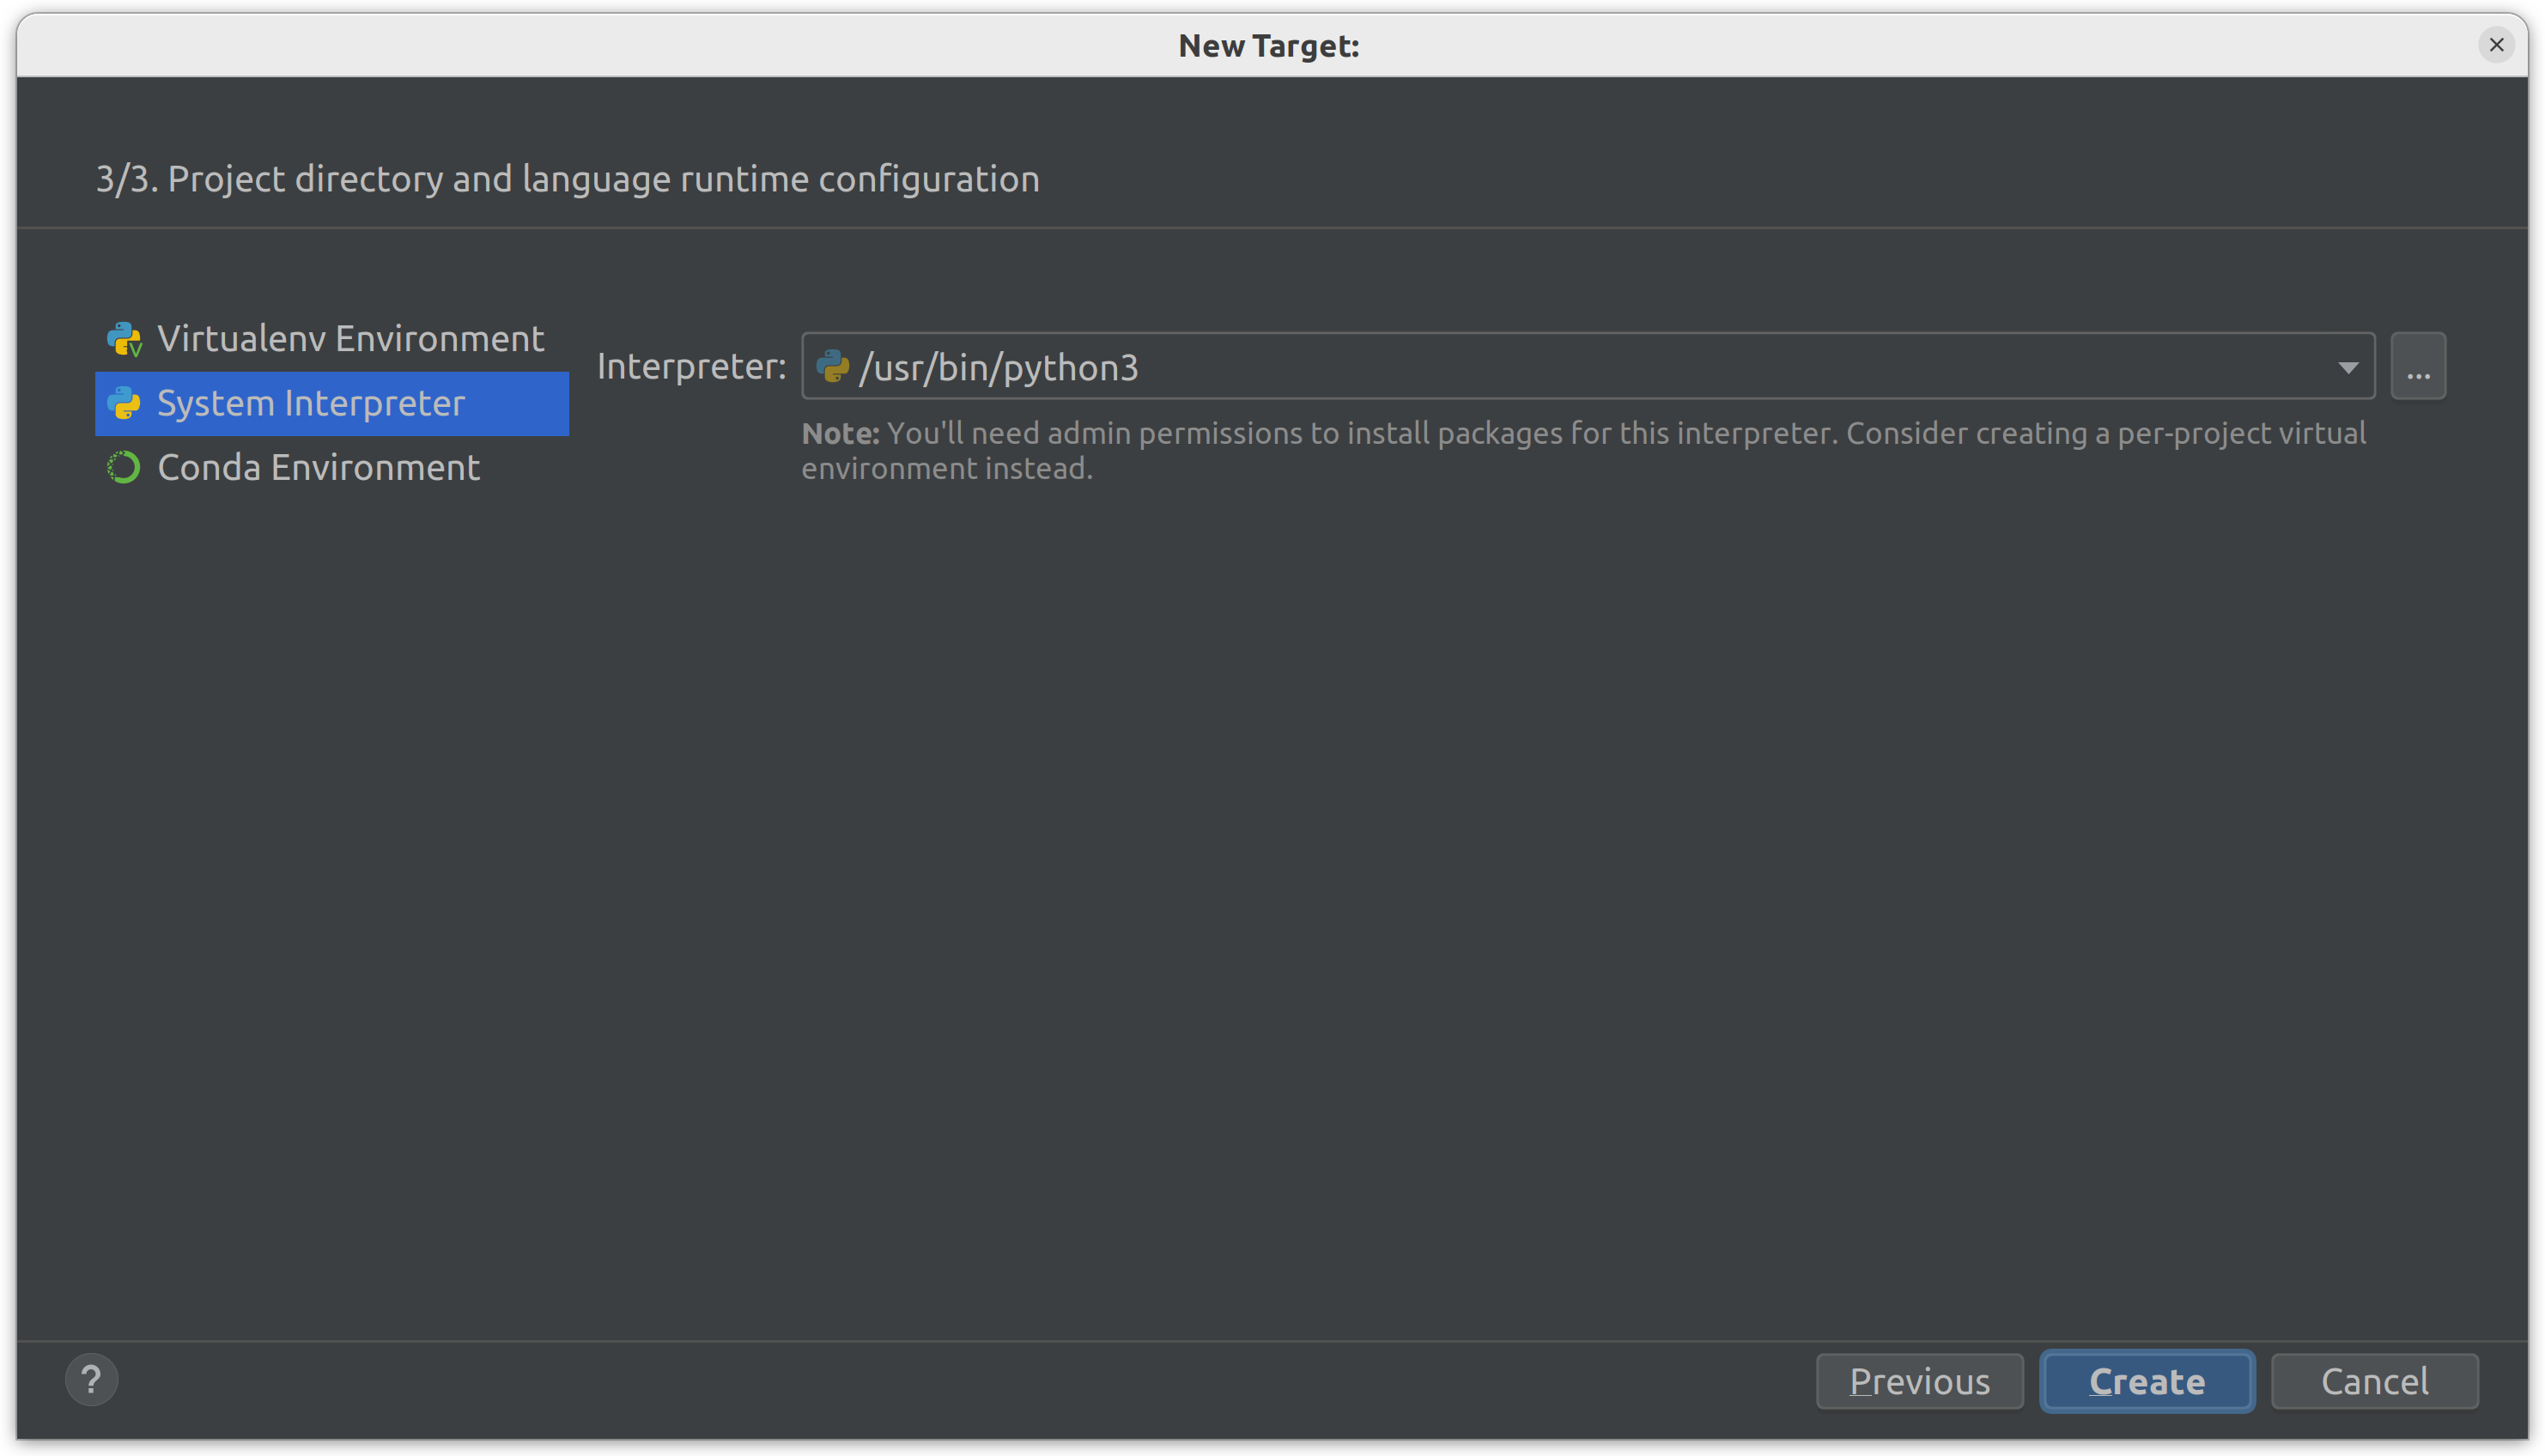
[Step 3 of 3]: Keep the default python interpreter (python3) and click Create:
Make sure that the
savantpackage is in the package list, click OK: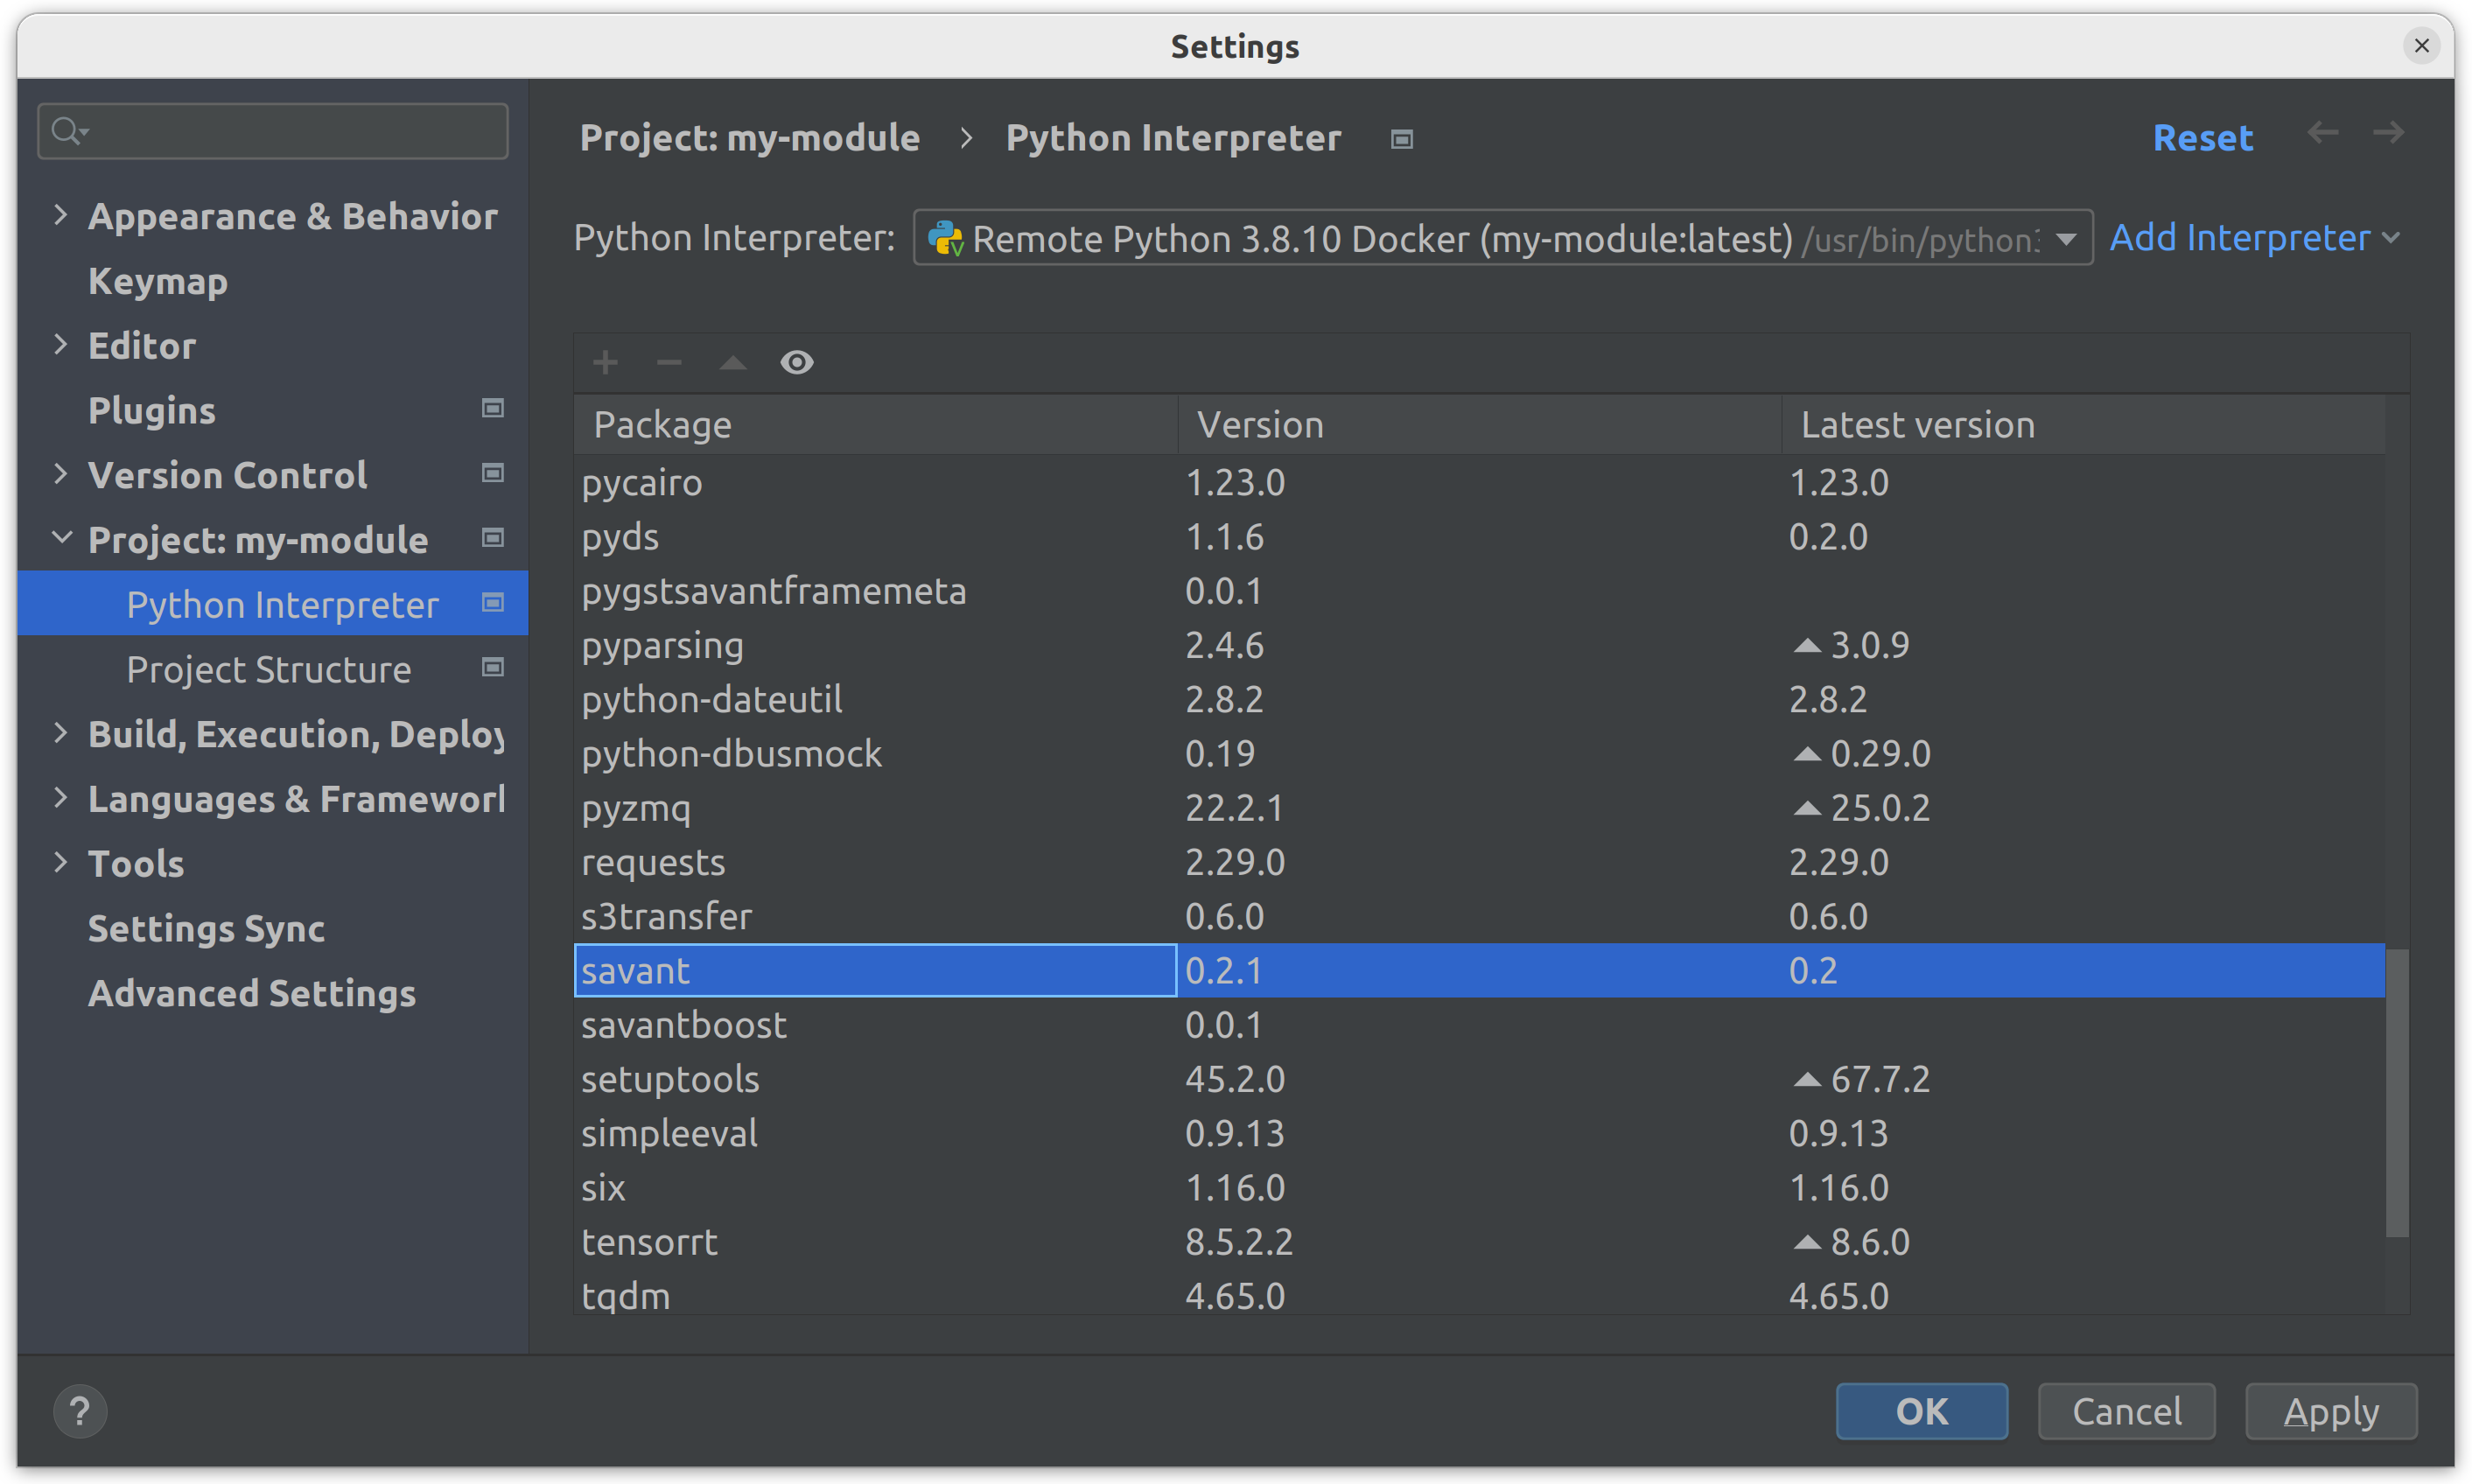
Open the
my-module/run.pyfile in the IDE.Check that IDE sees dependencies pointing the mouse over the line with the
importdirective: the popup must appear with the description of the function: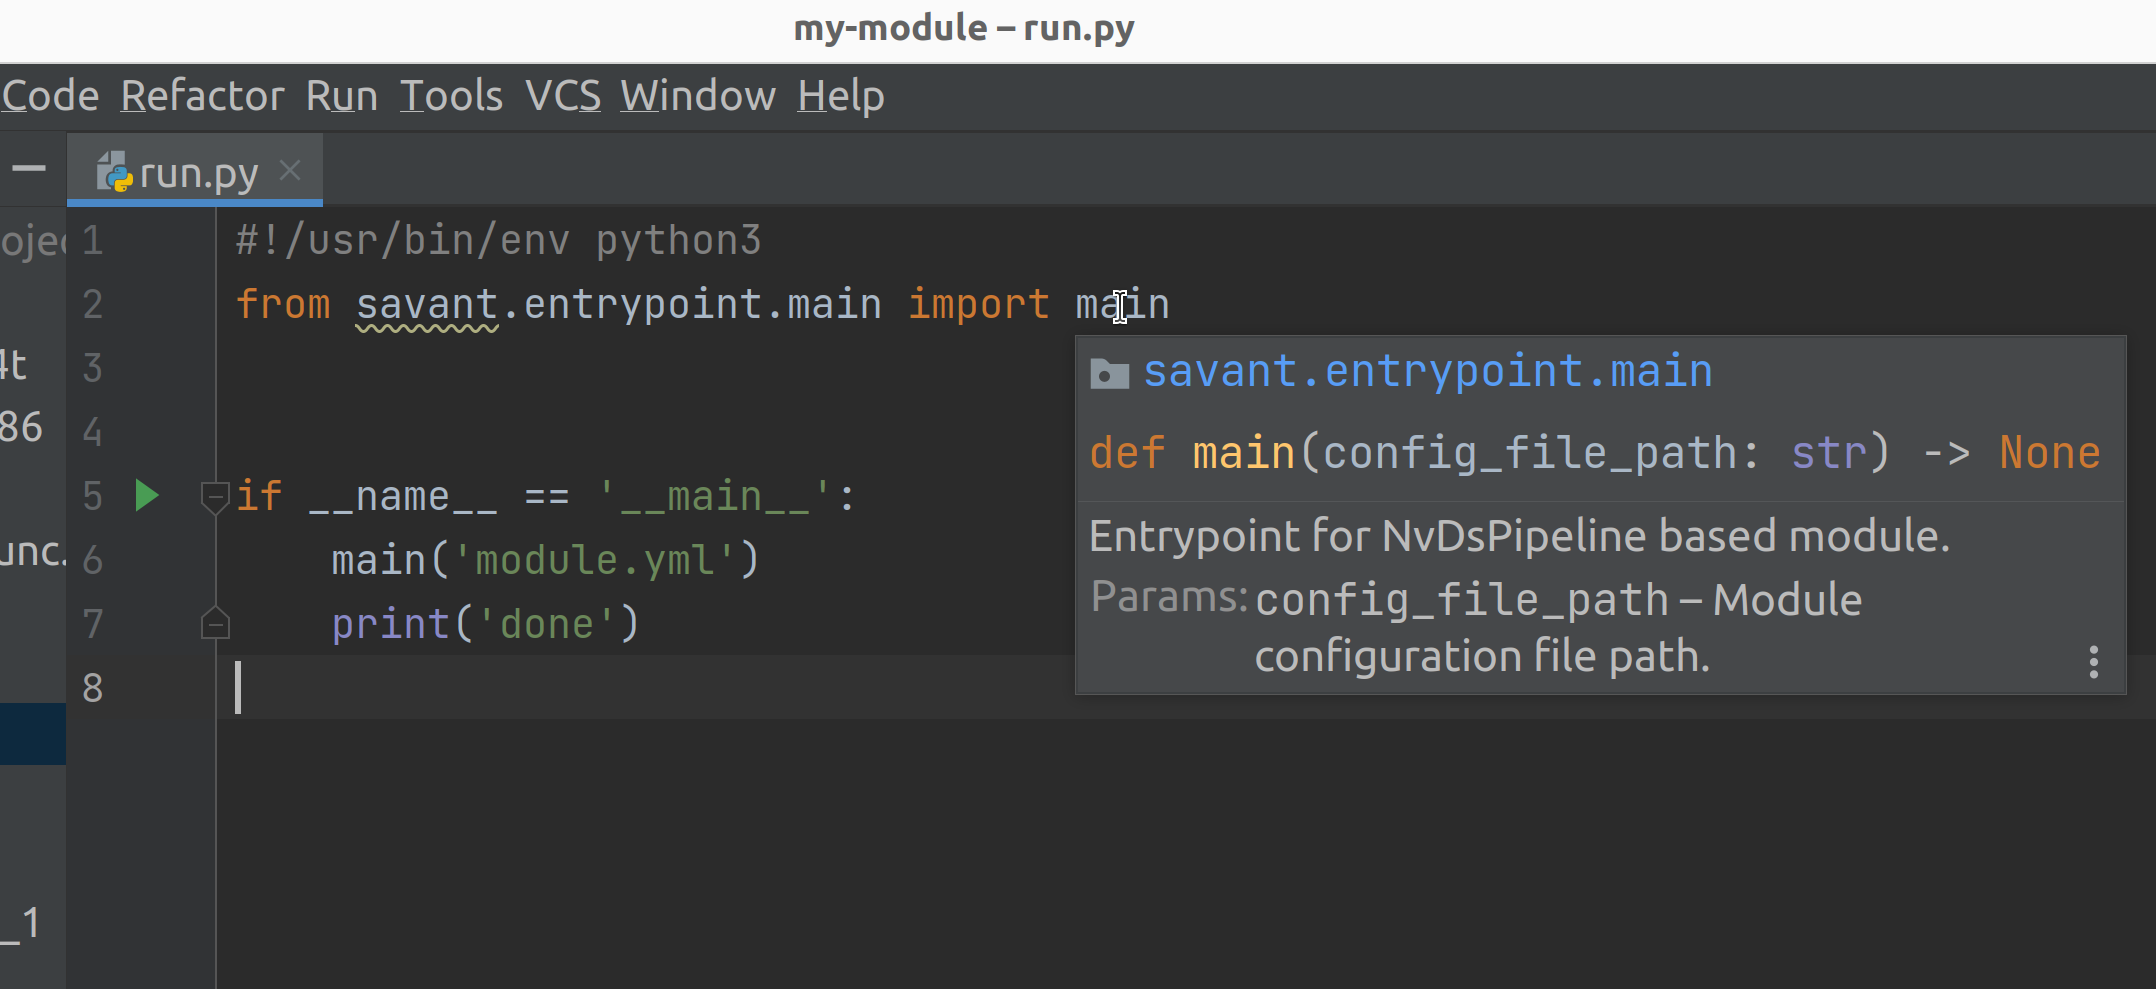
Configure Module Run
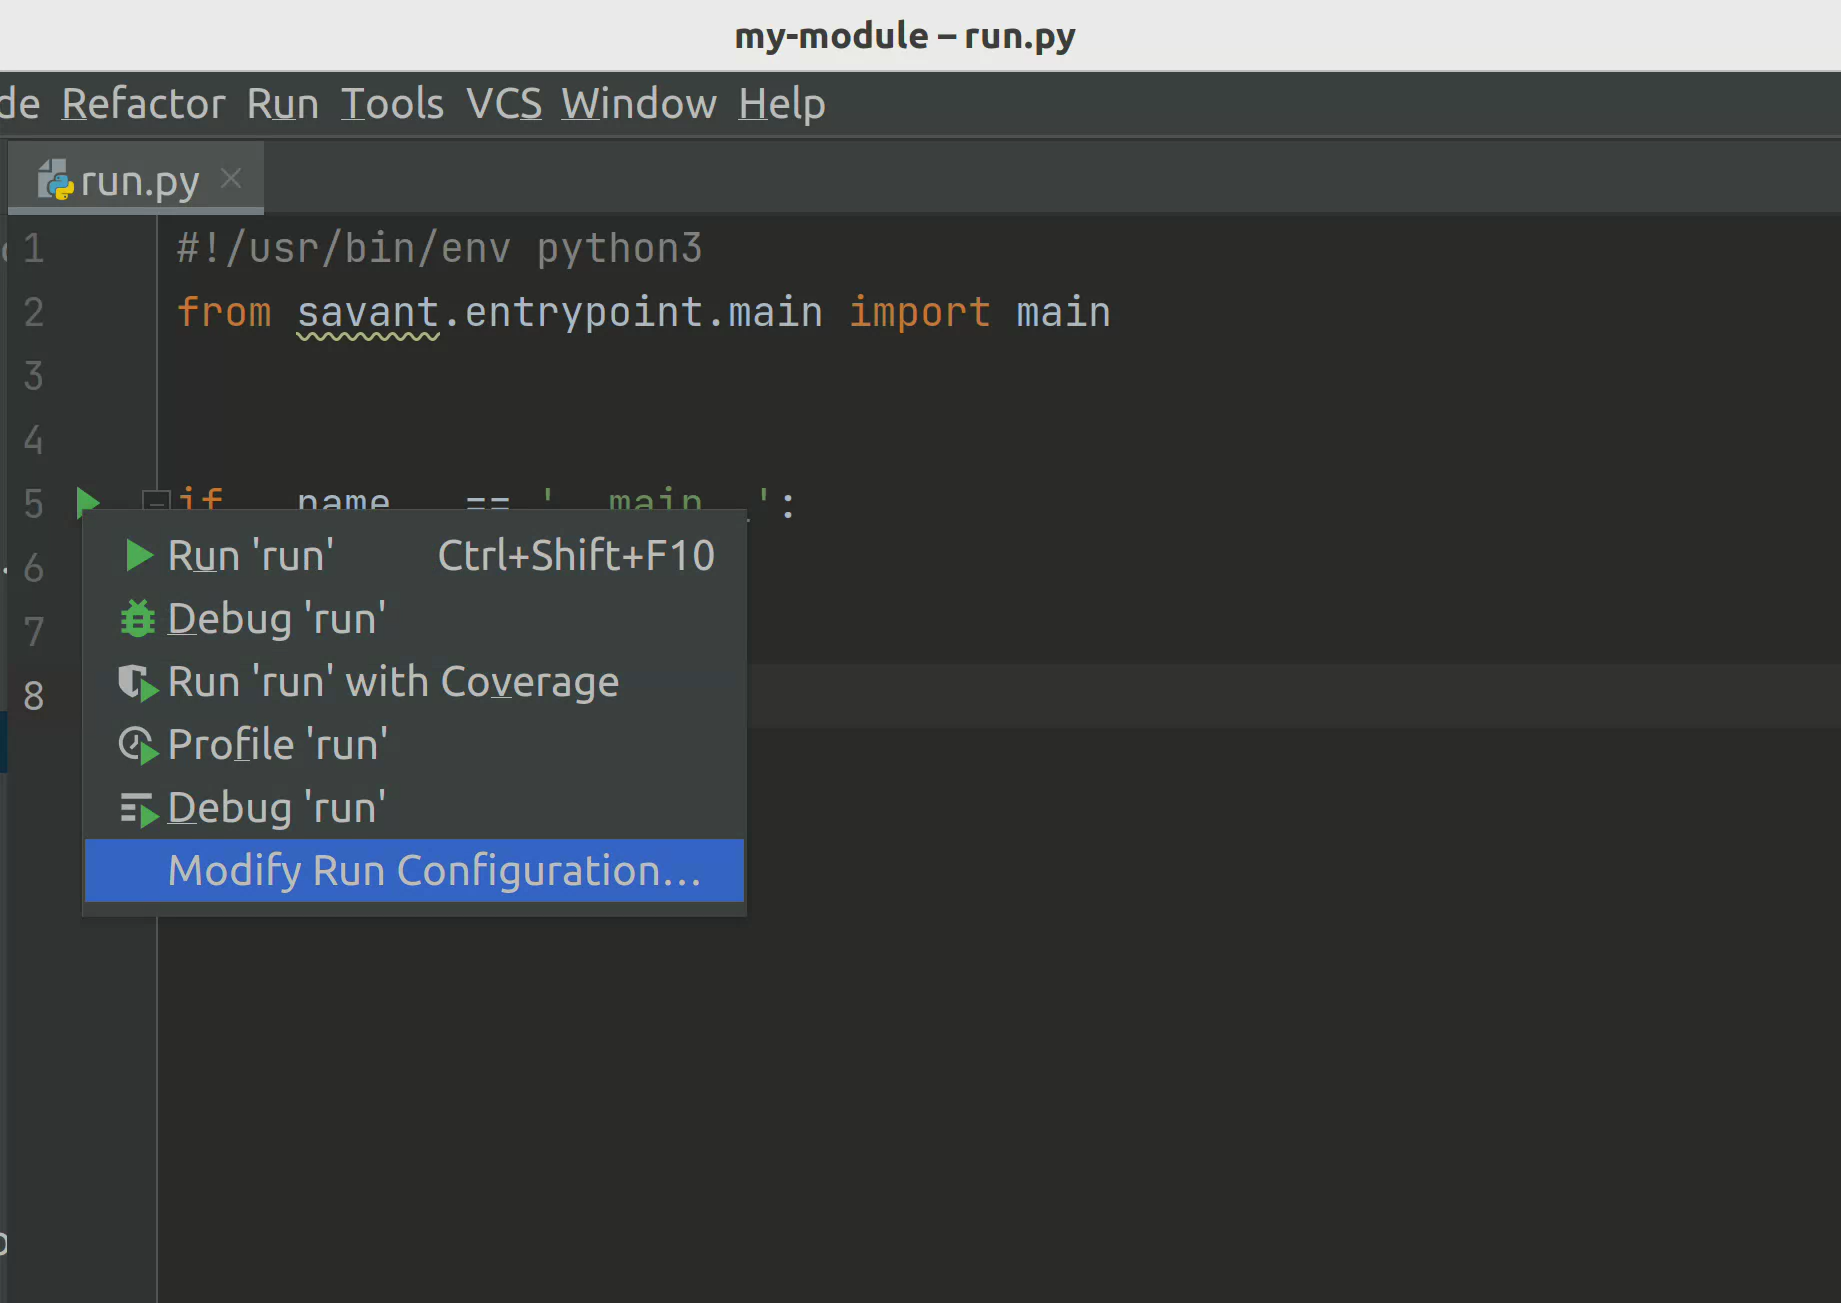
The run.py file is the entrypoint of the module, let’s configure the launch command for the script.
Click on the Run icon and choose Modify Run Configuration:
In the Environment section add
PYTHONPATH=/opt/savant(PyCharm rewritesPYTHONPATH):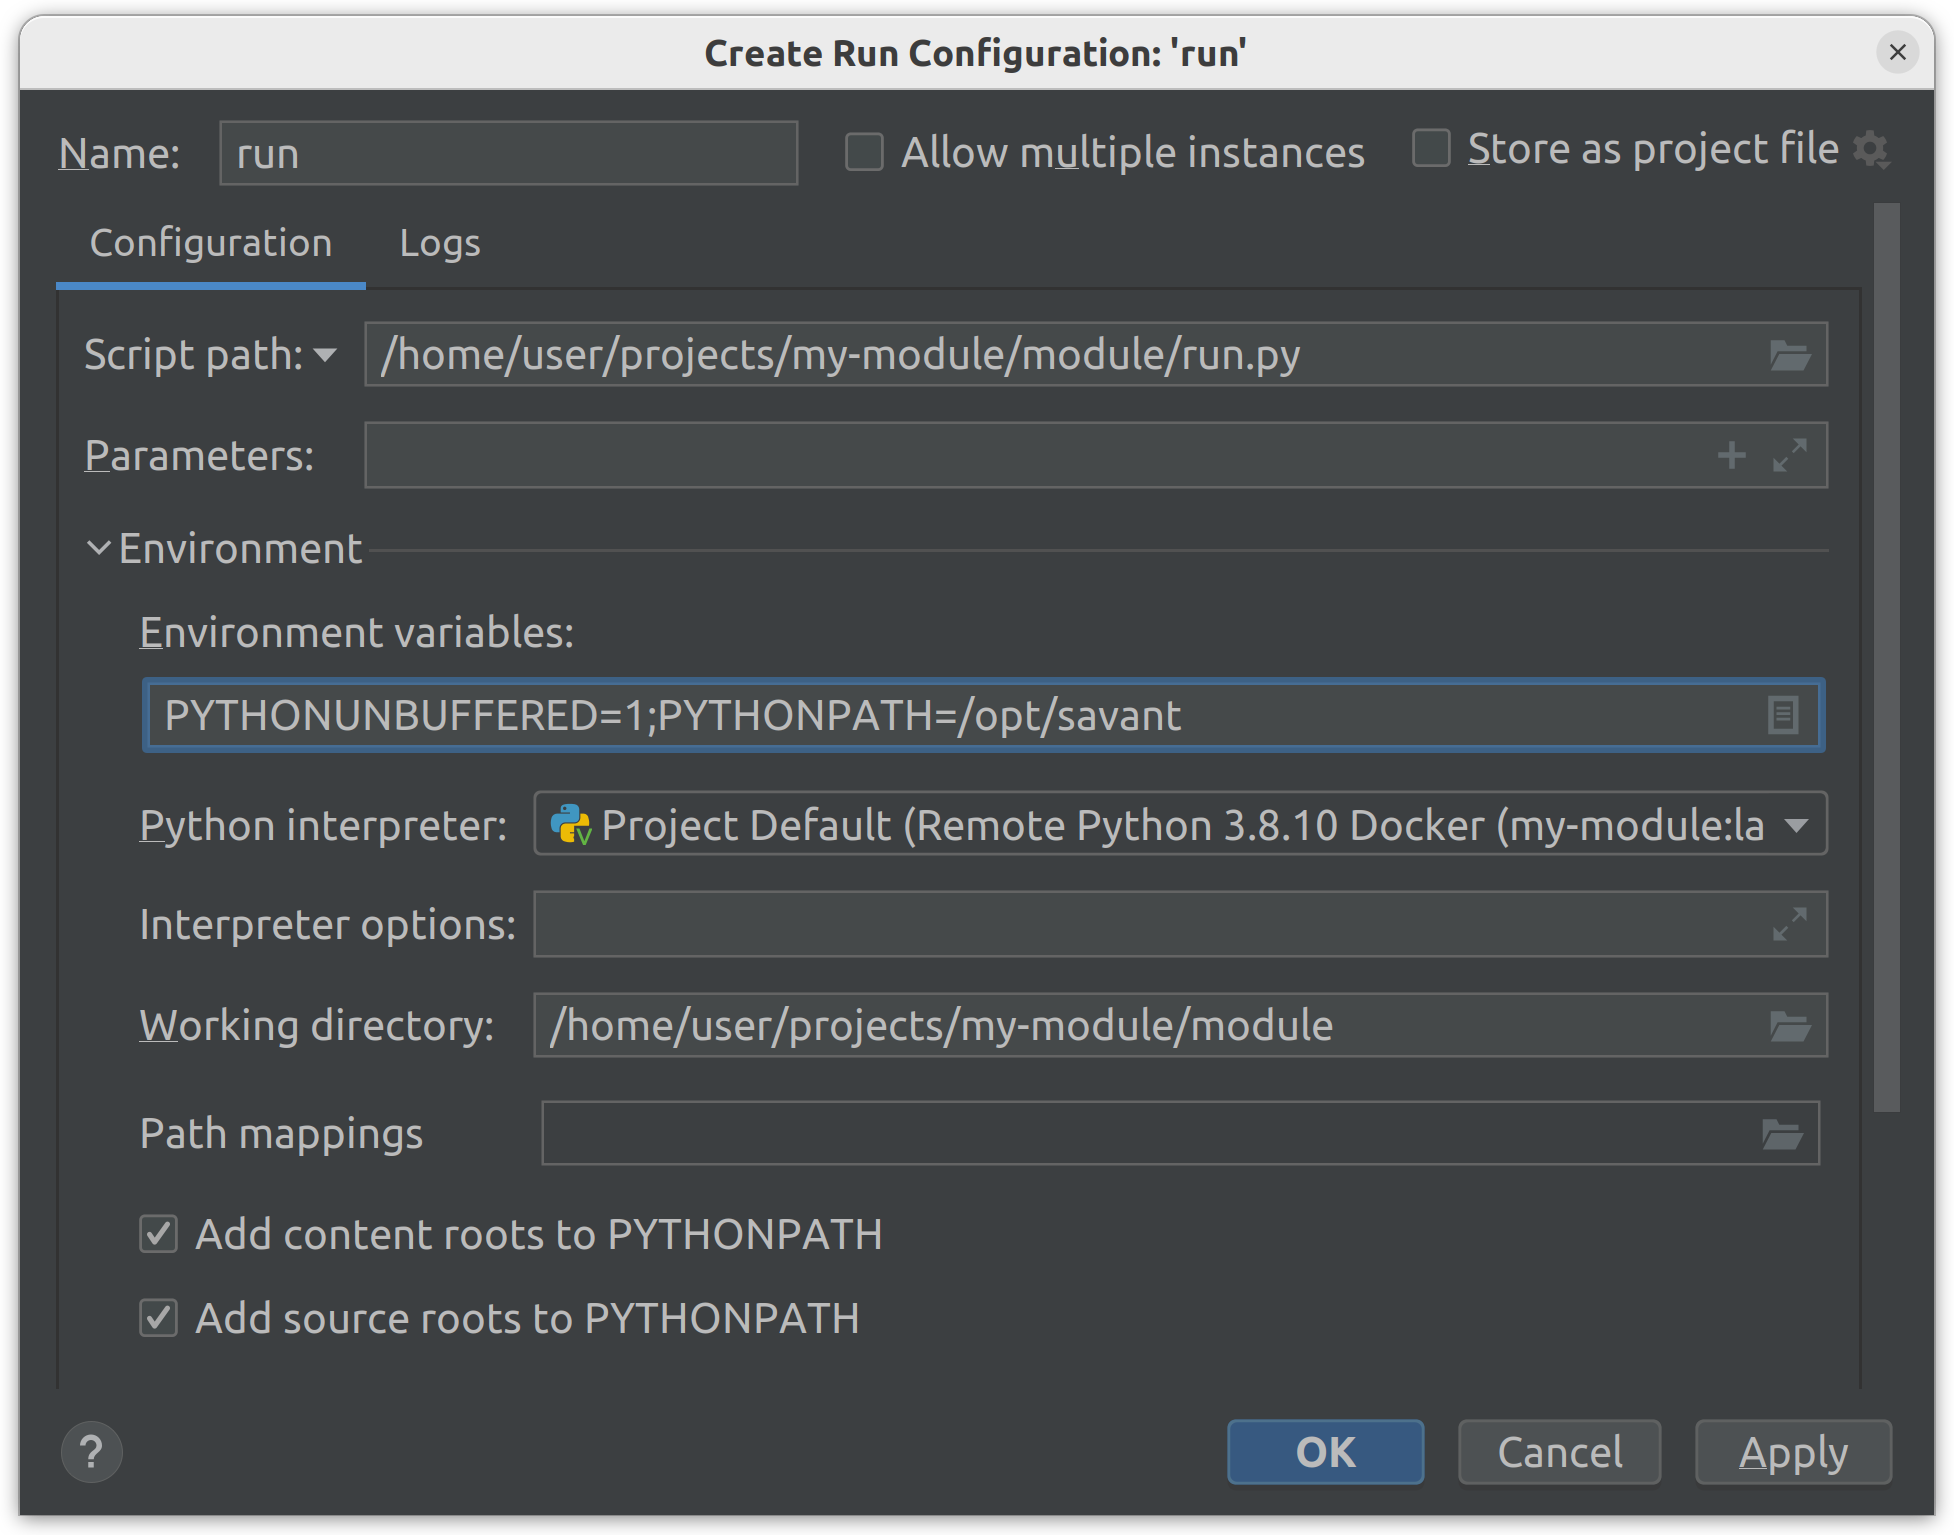
In the Docker container settings section add
--gpus all: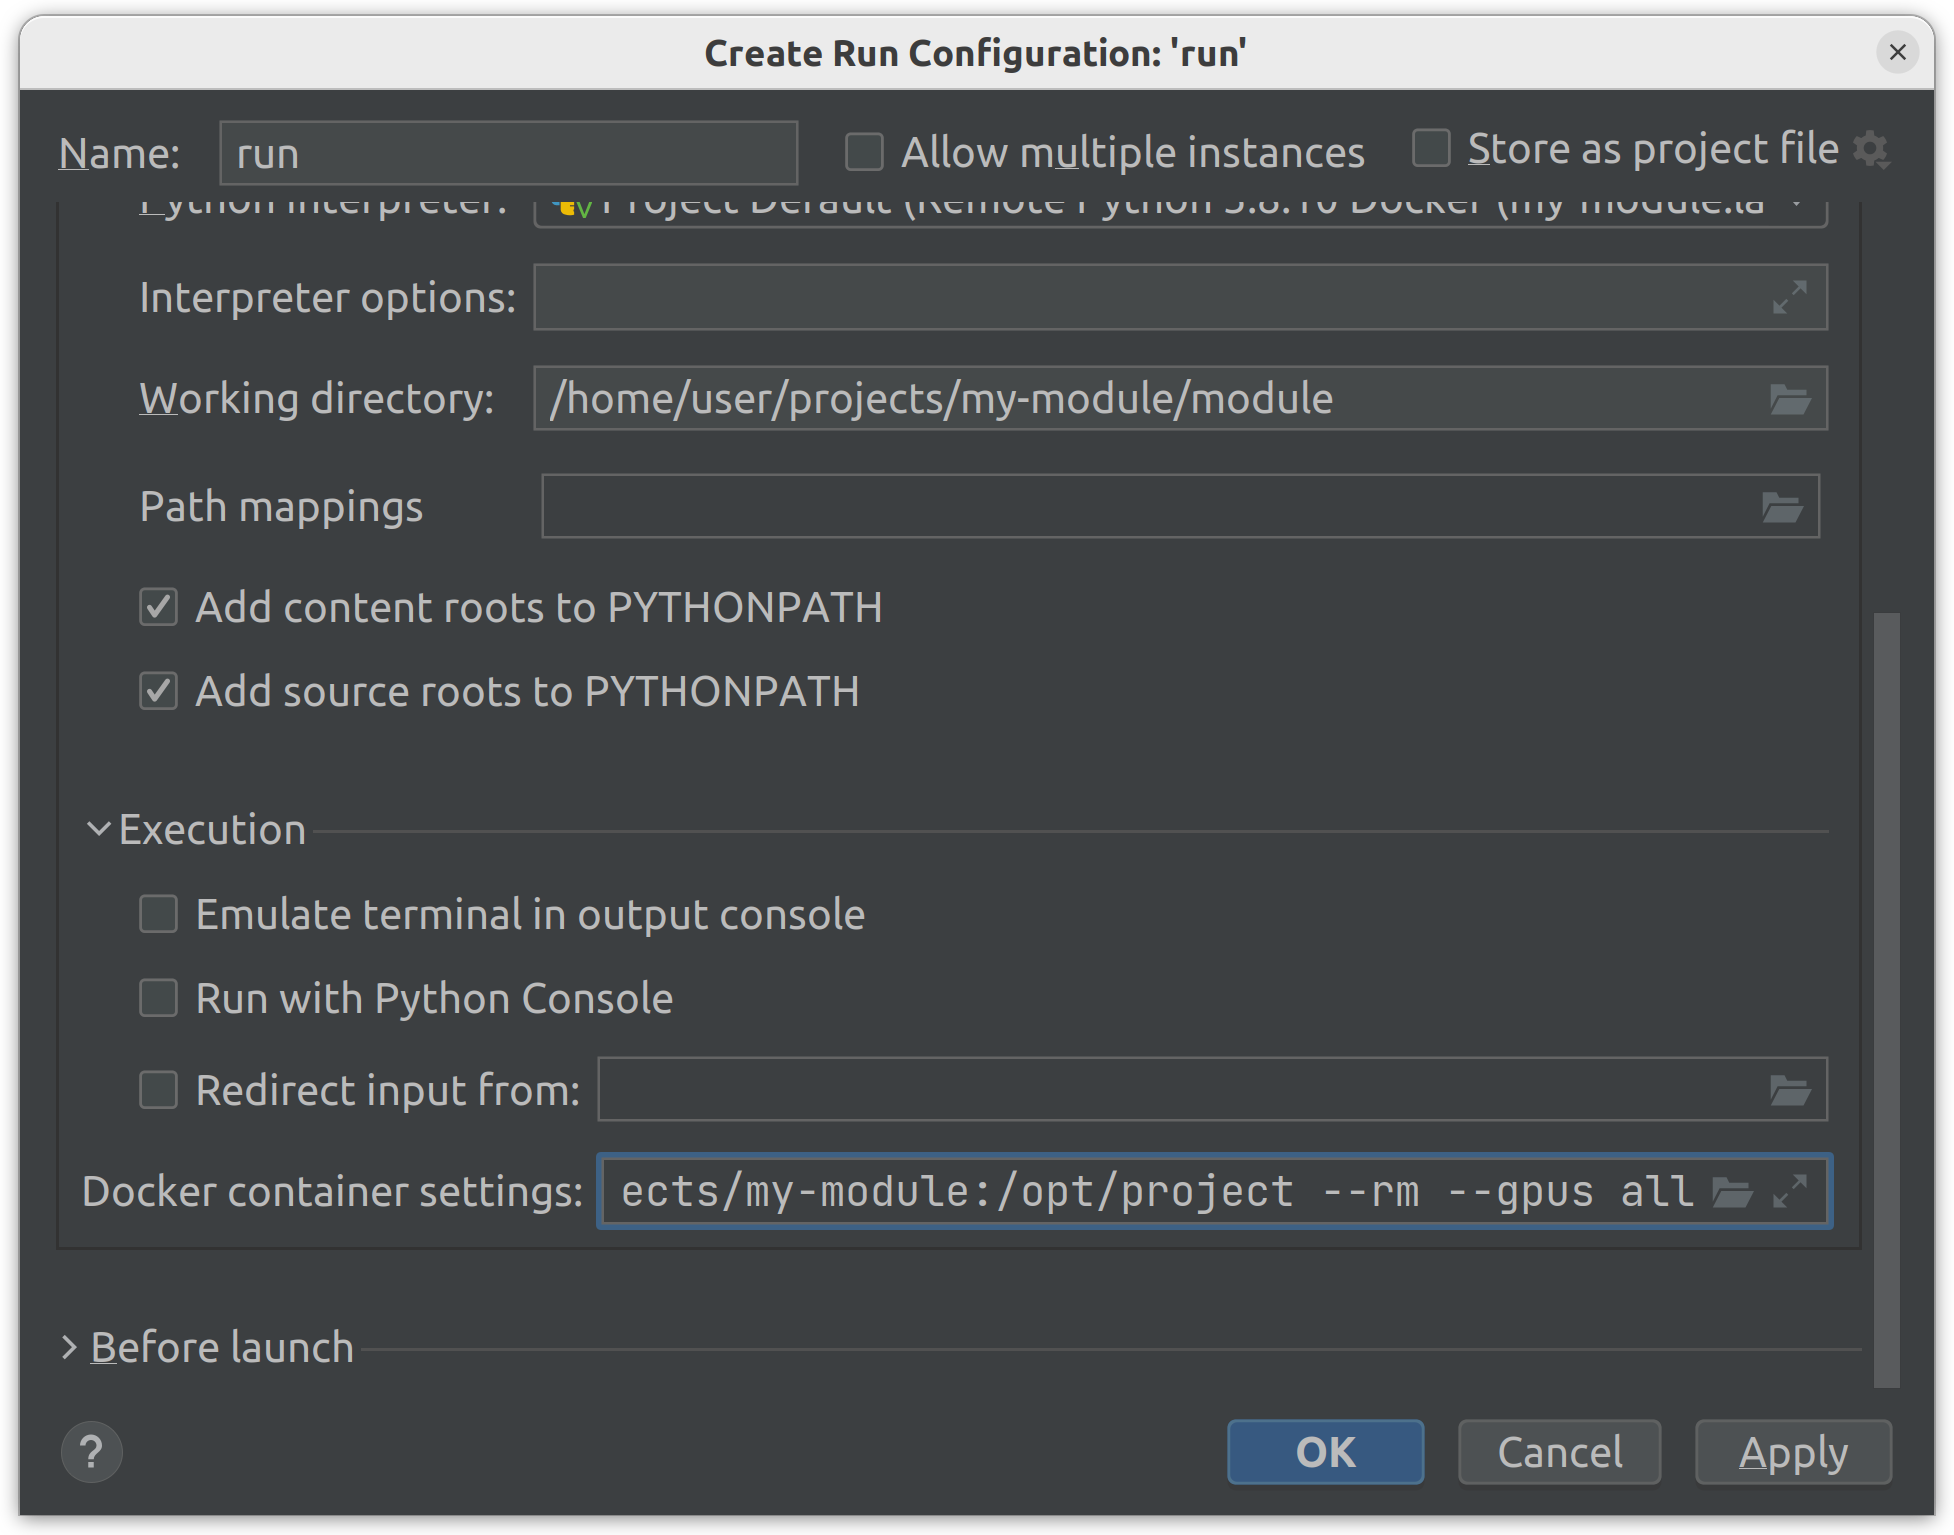
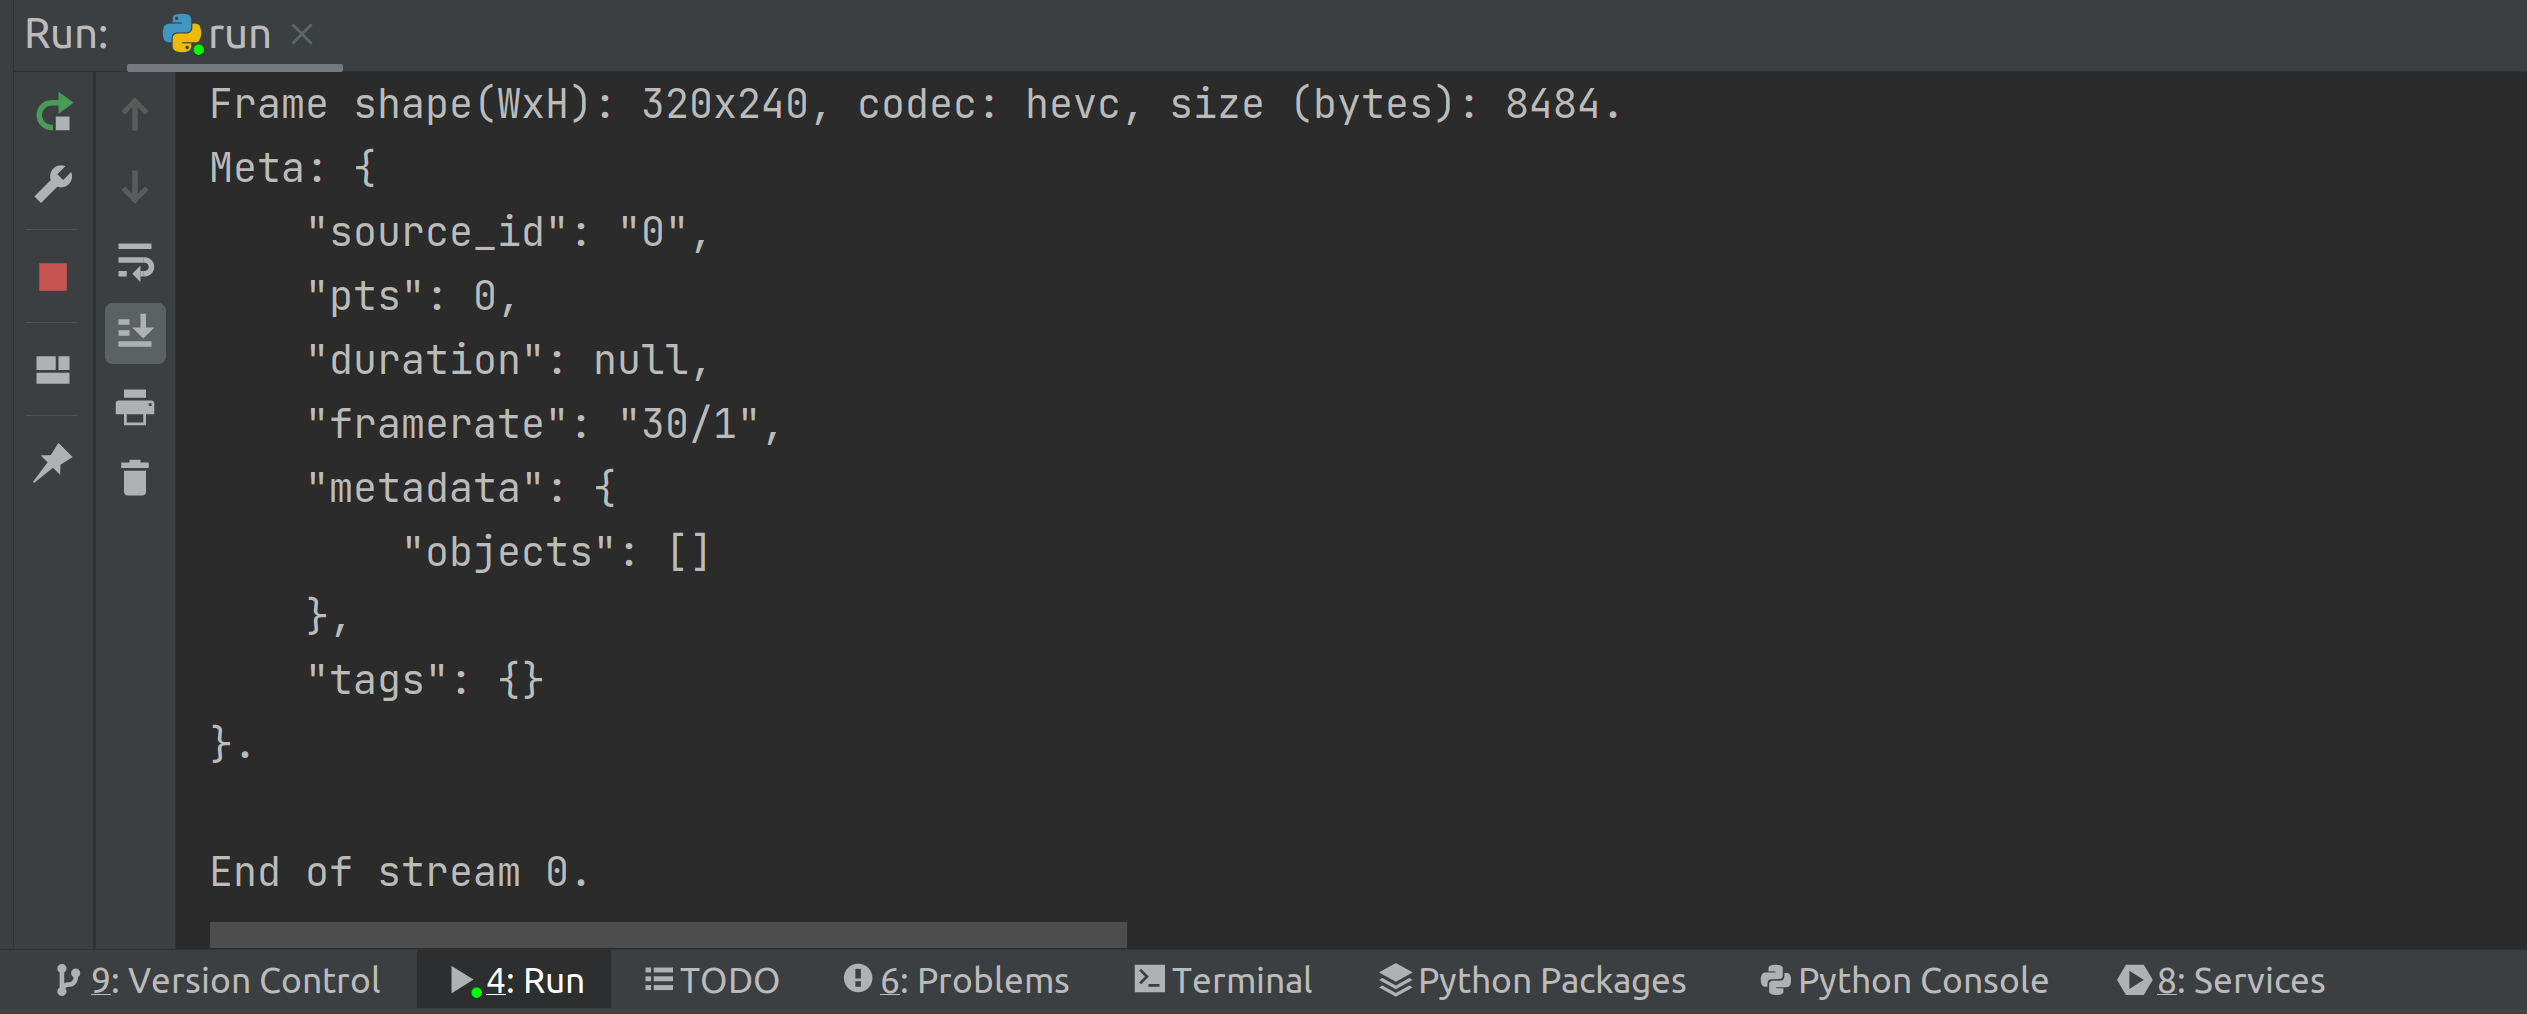
Launch the module by choosing Run ‘run’ or with the hotkey Ctrl+Shift+F10:

You may see various GStreamer error messages: it’s ok. At the end you will see the output with metadata:
That’s it, the environment is set up. Now you are ready to develop your own pipeline. See the next section to find out how.
Update Runtime On Container Change
Changes to the Dockerfile or the base image
You should check that the “Rebuild image automatically every time before running code” option is enabled in the “Python interpreters” settings. If this option is enabled and you have made any changes to the Dockerfile or updated the base image, you don’t need to do anything else. At the next run a new image will be built and the container will be updated.
Adding new packages to requirements.txt
Once dependencies are added to the requirements.txt, they will be automatically installed when building a new image.
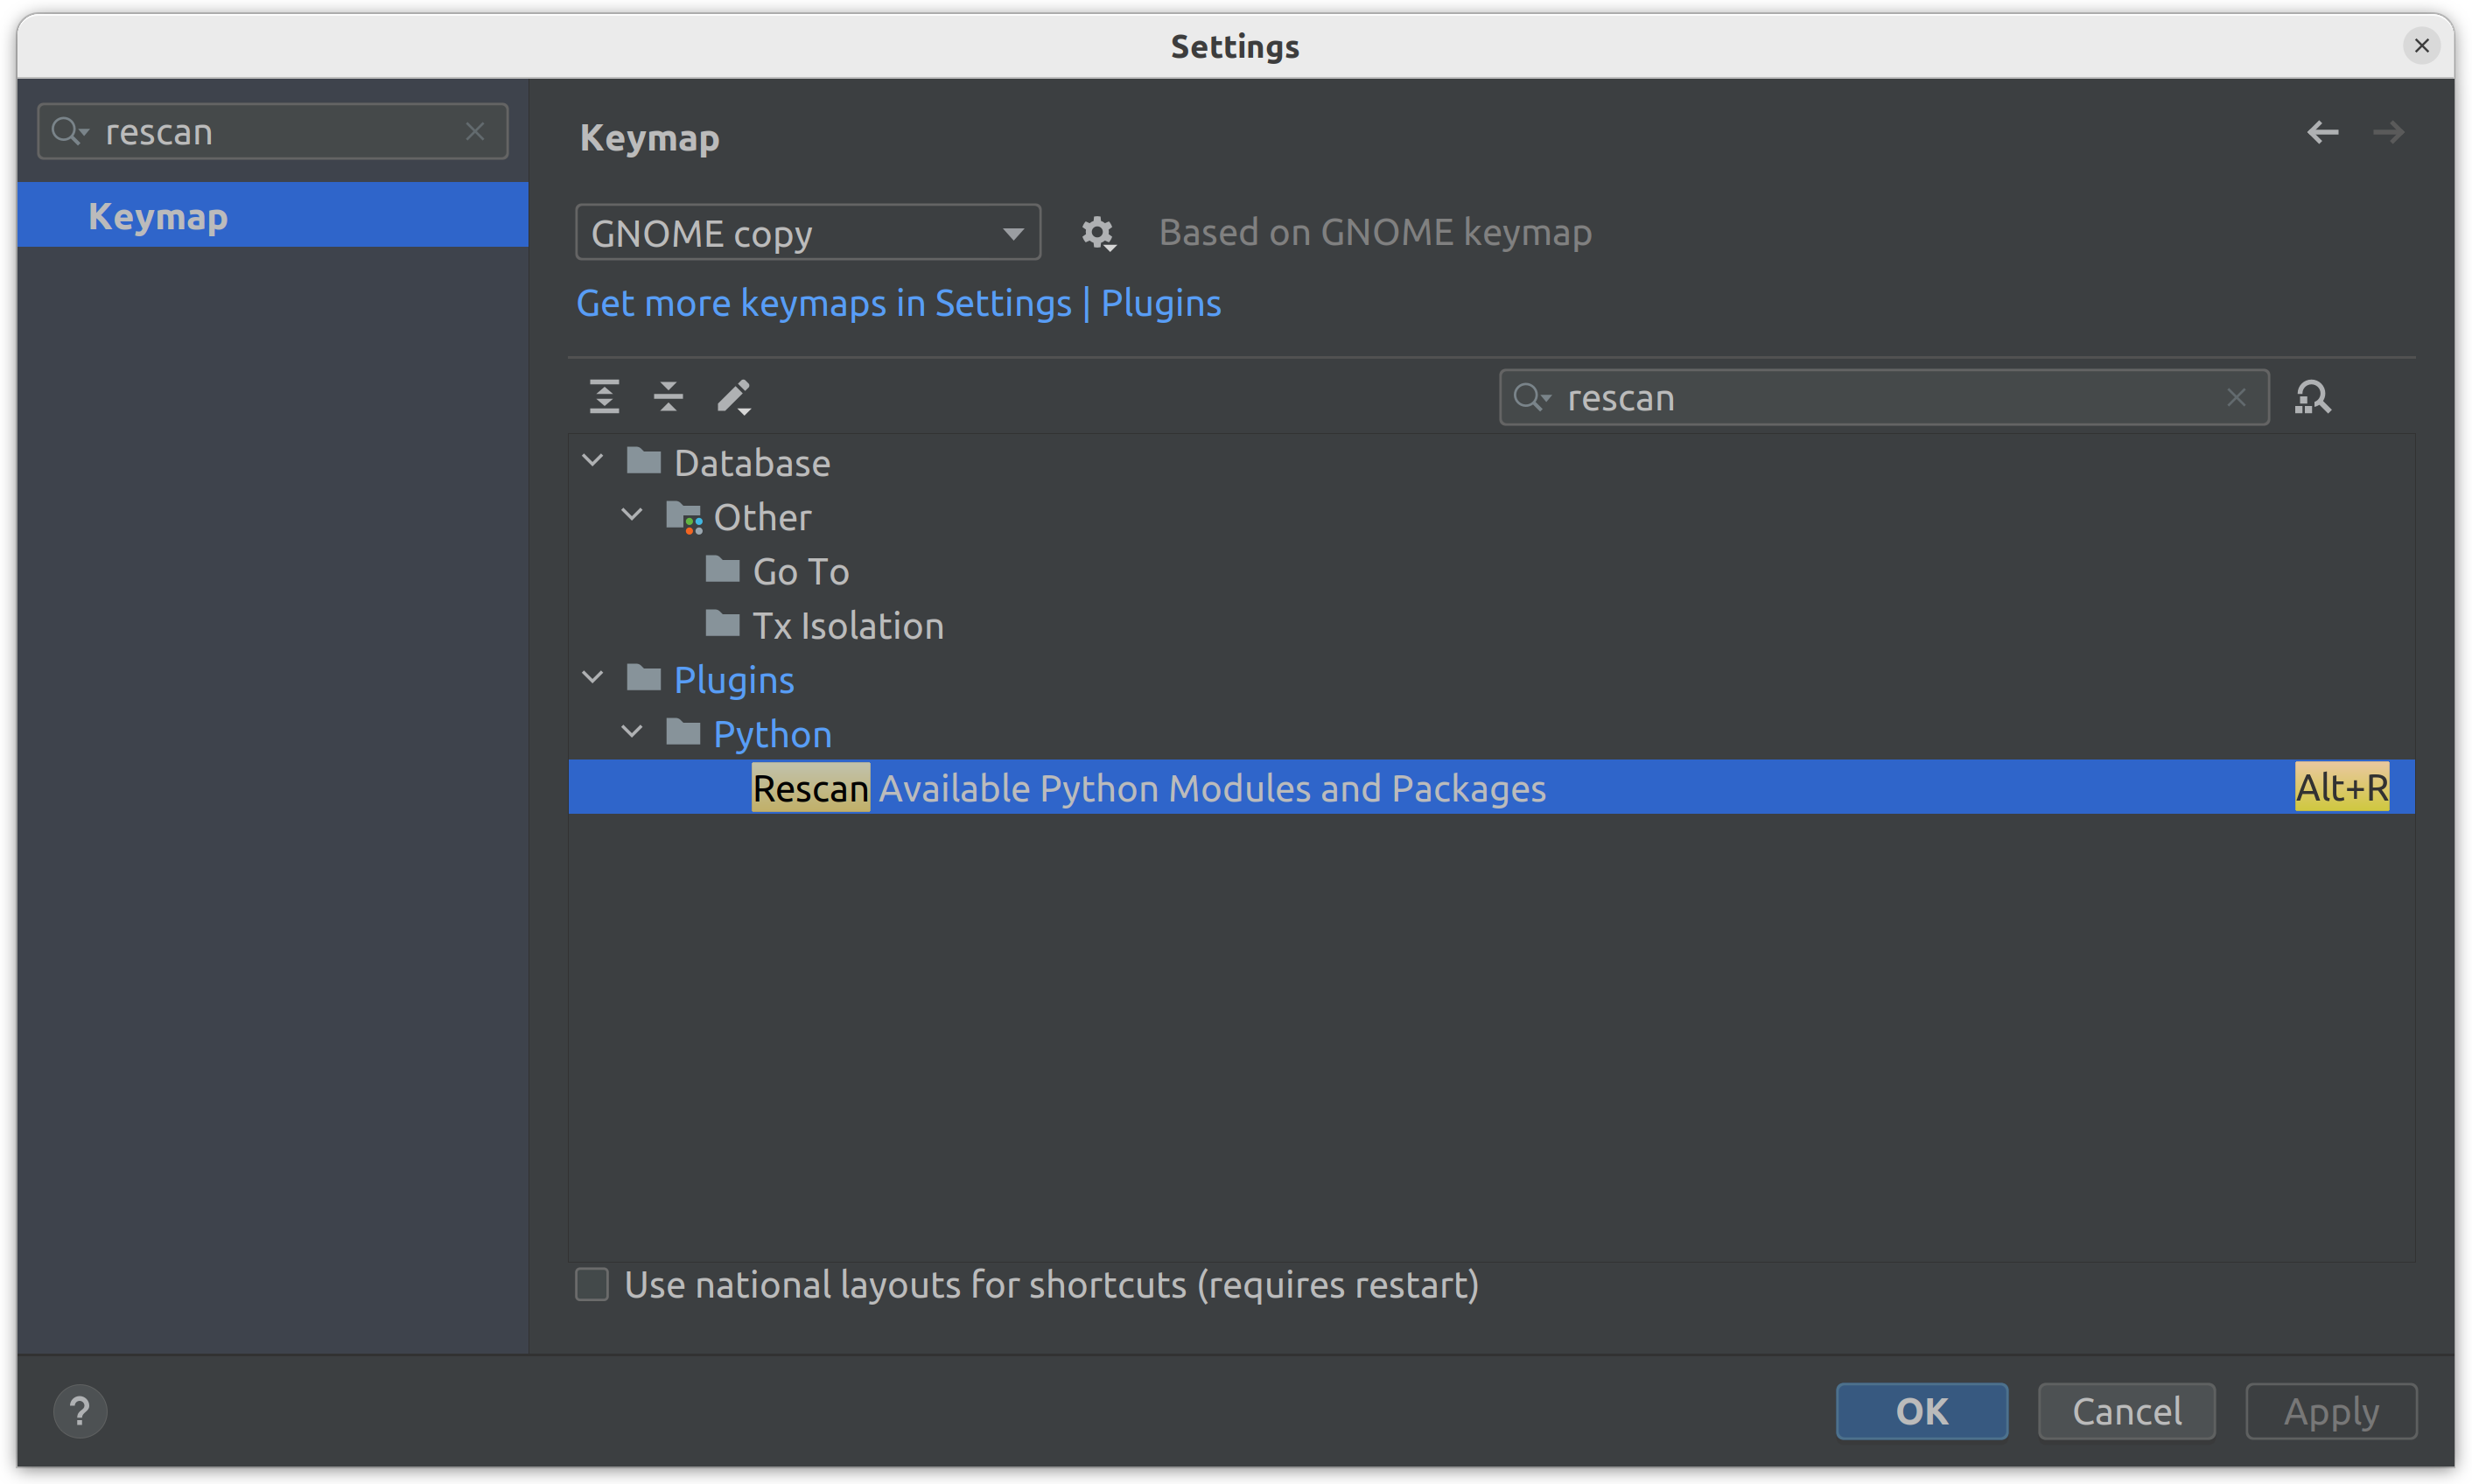
However, PyCharm does not automatically detect newly installed packages in the Docker container. The PyCharm will update the skeleton at the next startup or you can manually scan for new packages. To do this, you need to open the Settings and look for Rescan, then navigate to Plugins > Python > Rescan Available Python Modules and Packages and set the hotkey (e.g., Alt+R):
After adding a new package to the requirements.txt, simply press the specified hotkey to rebuild the image and update the packages.
In the following sections, you will find additional details on module development.