Preprocessing for models
Often, you may require the use of non-standard preprocessing methods. For instance, when working with a detection model that can identify rotated objects, you might come across an object that requires special preprocessing. In such cases, for the classification model, it is necessary to cut the object and rotate it to enhance the classification accuracy.
These scenarios call for the implementation of non-standard image processing algorithms to prepare the image before inferring the model.
There are two ways of preprocessing in the Savant framework: object meta preprocessing and object image preprocessing.
Object meta preprocessing
If you don’t need to make any changes to the image, or if you are working with aligned bounding boxes, then often all you need to do is change or fix the bounding box. For example, take its top half or add padding. In this case it is enough to write your own class inherited from BasePreprocessObjectMeta class and implement __call__ magic method.
class BasePreprocessObjectMeta(BasePyFuncCallableImpl):
    """Object meta preprocessing interface."""

    @abstractmethod
    def __call__(
        self,
        object_meta: ObjectMeta,
    ) -> BBox:
        """Transforms object meta.

        :param object_meta: original object meta
        :return: changed bbox
        """
Before model inference, custom preprocessing will be applied to all objects on frames. A copy of all
object meta-information is passed to this method. Note that changes in object meta-information
in preprocessing are not saved and do not affect the meta-information that will be after
model inference. The method is called for each object in the list of objects selected
for inference, based on the information you specified in the object of input section.
You can read about the working with metadata in the “Working With Metadata” section. The method must return an instance of the class BBox (The class of aligned bounding box).
After you implemented your own preprocessing class, you just need to specify the module in the
input section in the preprocess_object_meta subsection (this is the name of your module and
the file with the class. In the example person_detector is the name of the module and
input_preproc is the file with the class) and the name of the class
(in the example the TopCrop class).
Example config:
input:
    object: person_detector.person
    preprocess_object_meta:
        module: person_detector.input_preproc
        class_name: TopCrop
Object image preprocessing
This kind of preprocessing opens up more possibilities, because it allows you to interact directly with the image of an object. To implement your own image preprocessing you need to create your own class inherited from BasePreprocessObjectImage and implement the __call__ magic method.
class BasePreprocessObjectImage(BasePyFuncCallableImpl):
"""Object image preprocessing interface."""

    @abstractmethod
    def __call__(
        self,
        object_meta: ObjectMeta,
        frame_image: GpuImage,
        cuda_stream: cv2.cuda.Stream
    ) -> GpuImage:
    """Transforms object image.

    :param object_meta: object meta
    :param frame_image: original image
    :return: changed image
    """
The method passes meta information about the object, the whole frame (image) as an instance of the GPUImage class, and a CUDA stream.
Attention
Please note that you will be given the whole frame as an argument. If you draw, paste or modify something on it in any way, it will affect the frame. The frame you have changed will be passed on to the pipeline. That’s why we strongly recommend that you first cut out the part of the image with object, and then do transformations with that image.
You can use the CUDA stream to call asynchronous functions from OpenCV library. No additional synchronization is required from you to complete all operations, it will be done automatically before transferring images to the inference model. Each object uses its own stream for processing. This allows the processing of objects on the same frame in parallel with the most efficient use of GPU resources.
After you write your own preprocessing, you just need to specify the module in
the input section in the preprocess_object_image sub-section
(this is the name of your module and the file with the class.
In the example person_detector is the name of the module and input_preproc
is the file with the class) and the name of the class.
Example config:
input:
    object: person_detector.person
    preprocess_object_image:
        module: person_detector.input_preproc
        class_name: TopCrop
        output_image:
            width: 32
            height: 140
            method: scale # fit | scale
            interpolation: nearest # linear | cubic | area | lanczos4
You can also optionally specify the image dimensions, the resizing method and the interpolation method for the final transformation, after which the image will be transferred to the inference model.
GPUImage is a special wrapper class which allows you to simplify the work with the image on the GPU. A detailed specification of the methods can be found in the documentation. Let’s review the basic methods of this class, which will allow you to perform basic operations on the GPU
GPUImage class properties:
- gpu_mat - returns an instance of the GpuMat class from OpenCV.
- width - image width in pixels.
- height - image height in pixels.
GPUImage class methods:
- to_cpu - copies image from GPU memory into RAM. The image is returned as instance of CPUImage class.
def to_cpu(self) -> CPUImage:
- сut - cuts out of the image part defined by normal or rotated box. If a rotated box is specified, it cuts out part of the object by the rectangle enclosing the rotated box. The method returns the cut part of the image and the box with coordinates relative to the new image.If the boundaries of the box go beyond the image, the resulting image will contain only the part that falls within the intersection of the box and the image, and the rest will be filled with black.
def cut(self, bbox: Union[BBox, RBBox]) -> Tuple['GPUImage', Union[BBox, RBBox]]:
ref_image = cv2.cvtColor(cv2.imread("55_ref.jpeg"), cv2.COLOR_RGB2BGR)
gpu_ref_image = GPUImage(ref_image)
cut_bbox = BBox(xc=gpu_ref_image.width//2, yc=0, width=1000, height=200)
res_image, _ = gpu_ref_image.cut(cut_bbox)
cv2.imwrite('55_res.jpeg', cv2.cvtColor(res_image.gpu_mat.download(), cv2.COLOR_RGB2BGR))
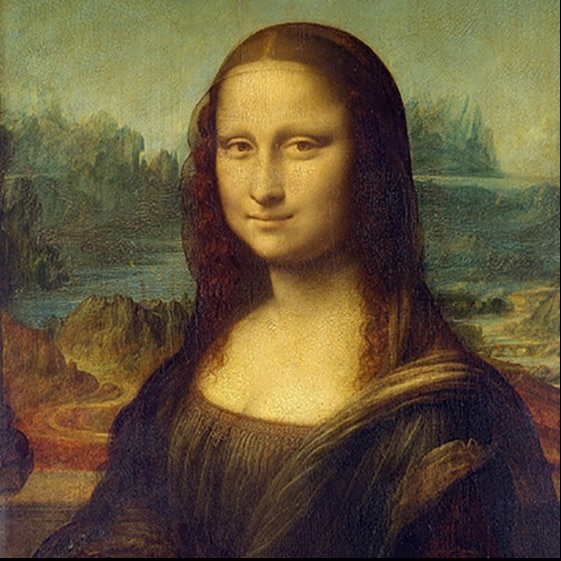
Reference image

Result image
- concat - allows you to combine two images into one. The first image is the image from which this method is called, the second is the image that is passed to the method. You can specify whether images should be vertically or horizontally joined.
def concat(self, image: 'GPUImage', axis: int = 0) -> 'GPUImage':
- paste - inserts the image into the current image. The insertion place is specified as a point on the upper left corner of the inserted image.
def paste(self, image: 'GPUImage', point: Tuple[int, int]):
- rotate - rotates the image by a specified angle. You can also pass an object bounding box to the method, so that it is rotated together with the image. The method returns the rotated image and the box.
def rotate(self, angle: float, bbox: Optional[RBBox] = None) -> Tuple['GPUImage', RBBox]:
- resize - resizes the image and returns the result as a new image. You can specify the resize method. Fit - the image will be resized without aspect ratio preservation, scale - the image will be resized with aspect ratio preservation and indentation. You can also specify the interpolation method.
def resize(
    self,
    resolution: Tuple[int, int],
    method: str = 'fit',
    interpolation: int = cv2.INTER_LINEAR,
) -> 'GPUImage':
CPUImage has the same methods as GPUImage, but they work with images in RAM, instead gpu_mat property it has np_array property, which returns an instance of the numpy array and instead to_cpu method it has to_gpu method, which copies image from RAM into GPU memory.
def to_gpu(self) -> cv2.cuda.GpuMat:
Using these basic methods you can do most of the necessary transformations.